Getting your coffee brand set up
Everything you need to go from signing up to having customers earning points on your coffee — connecting your store, understanding each screen in your panel, and launching properly.
1. Creating your account
BeanTrace has two sides: the app your customers use, and the panel where you run your brand. This guide is about the panel, at roaster.beantrace.app.
Sign up and choose what you are
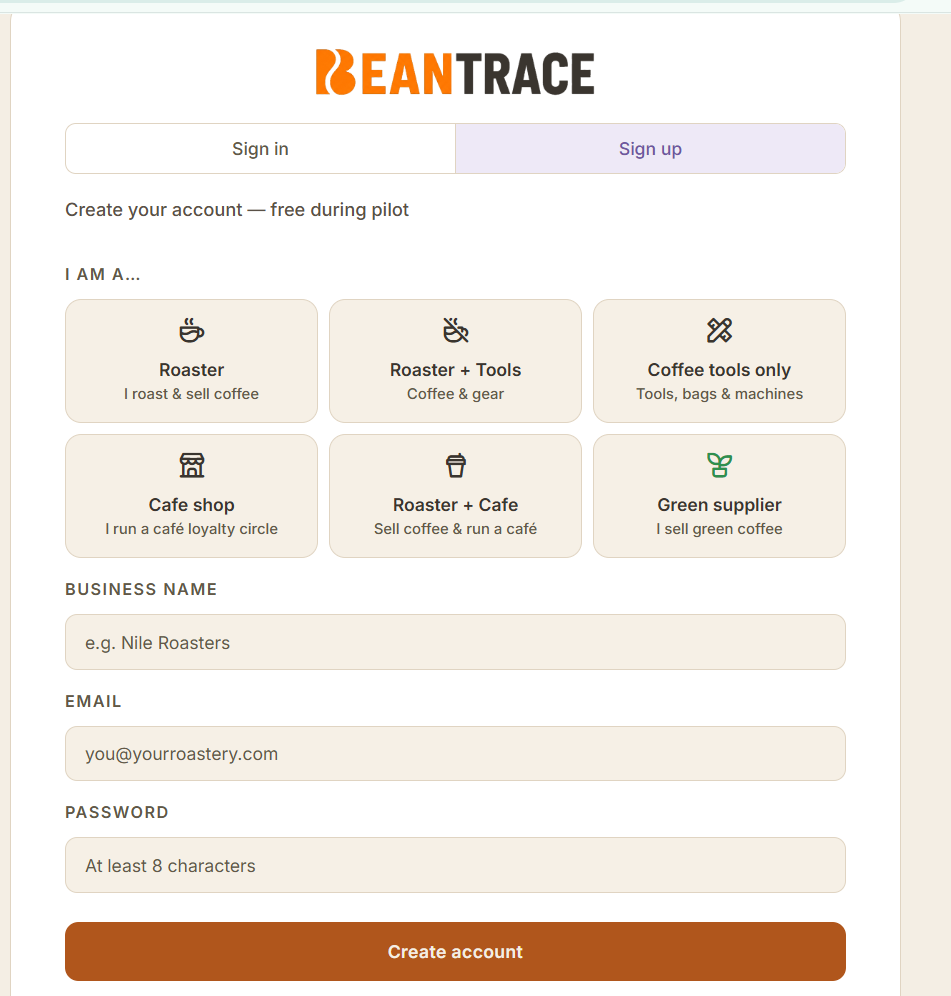
Go to roaster.beantrace.app, press Sign up, and pick the one that describes you:
| Roaster | You roast and sell coffee. |
| Roaster + Tools | Coffee and gear. |
| Coffee tools only | Tools, bags and machines — no coffee. |
| Cafe shop | You run a café loyalty circle. |
| Roaster + Cafe | You sell coffee and run a café. |
| Green supplier | You sell green coffee to roasters. |
This decides which screens appear in your panel. Then add your business name, email and a password of at least 8 characters. It's free during the pilot.
Wait for approval
New brands are reviewed before going live. Until you're approved, customers can't find you in the app — this keeps the directory trustworthy for everyone. It's usually quick; you'll hear from us by email.
One email is one identity — choose it deliberately
This catches people out, so it's worth understanding before you sign up. BeanTrace recognises you by your email address, not by which side you're using. If you sign up your brand with the same email you use as a customer in the app, they are the same account — and your brand name is what everyone sees.
So if you're a customer called Ahmed and you register your roastery as "Nile Roasters" on that same address, the app stops showing you as Ahmed. Your profile, your community posts, your reviews and your comments all appear as Nile Roasters, with a brand badge. Your points and history stay exactly where they are — only the name and badge change.
That's often what you want: when you post in your own community, customers should see the brand, not a stranger's first name. But decide which you want before you sign up:
| If you want… | Do this |
|---|---|
| To be seen as your brand everywhere | Use the same email for the panel and the app. Simplest, and best for most owners. |
| To keep a private personal account | Use a different email for the panel than the one you use as a customer. Two emails, two separate identities. |
You can set everything up while you wait for approval — products, points, rewards, offers. Nothing is visible to customers until you're approved, so there's no risk in getting ahead.
2. Connecting Shopify
If you sell on Shopify, connect it first. BeanTrace pulls in your products, customers, and orders automatically, so your catalogue and customer list are populated from day one instead of typed in by hand.
This is a one-time setup inside your own Shopify admin. It takes about five minutes.
Create an app in Shopify
In Shopify: Settings → Apps and sales channels → Develop apps → Create an app. Name it BeanTrace.
Give it permission to read your data
Open Configuration → Admin API scopes and enable these four:
These are read-only. BeanTrace never changes anything in your Shopify store.
Install it and copy the credentials
Click Install app, then open the API credentials tab and copy the Client ID and Client Secret.
Paste them into BeanTrace
Back in your panel, enter your store URL (your-store.myshopify.com) with the Client ID and Secret, then press Connect and run first sync. Your products and customers start appearing straight away.
Letting customers buy inside the app
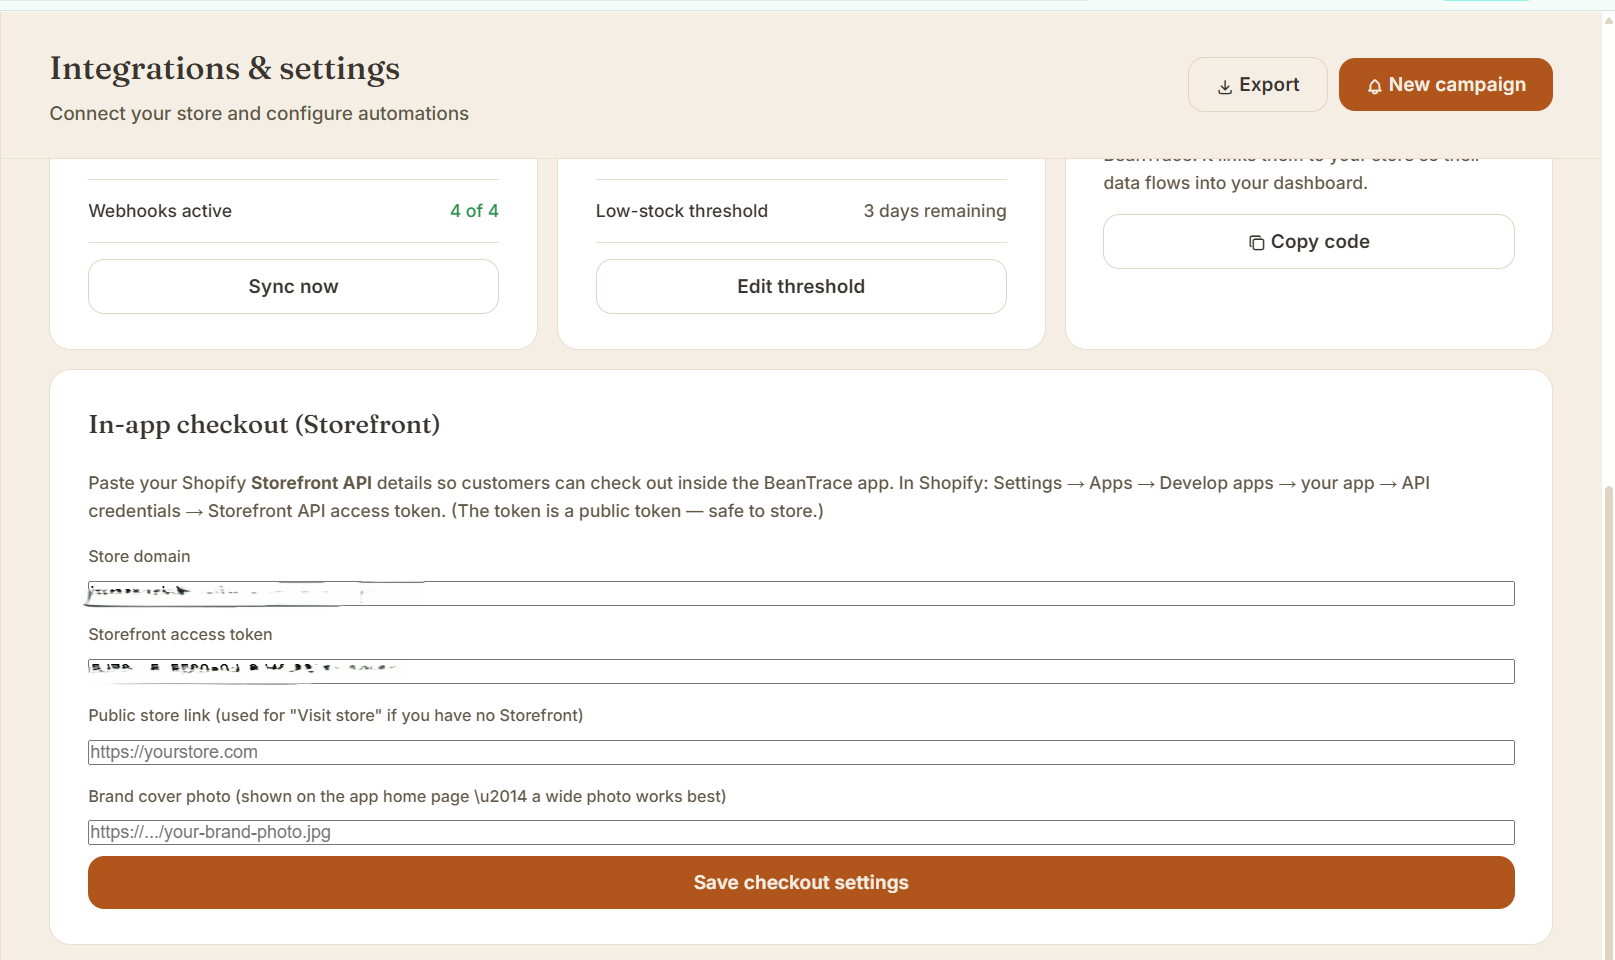
Optional, and separate from the sync above. In Integrations you can add your Storefront API details so customers check out without leaving BeanTrace. In Shopify: Settings → Apps → Develop apps → your app → API credentials → Storefront API access token. That token is public by design, so it's safe to store.
Two fields here are easy to miss. Public store link is where customers land if you don't use Storefront checkout — set it, or the "Visit store" button has nowhere to go. Brand cover photo is the wide image on your brand's page in the app.
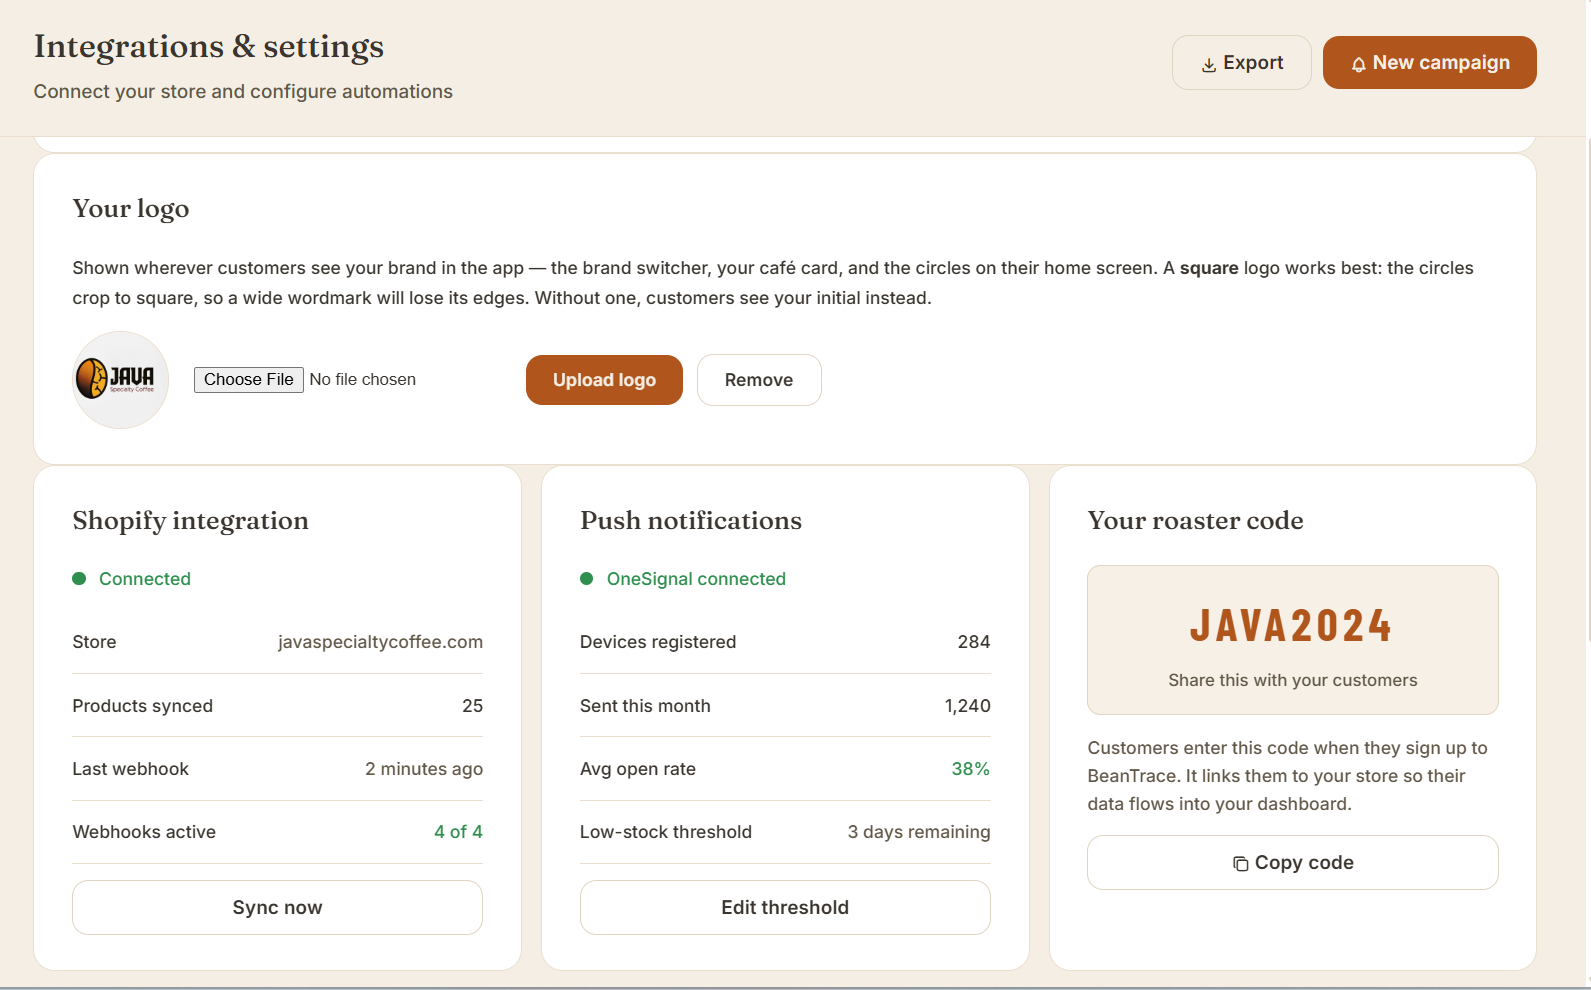
Open Integrations. You should see Connected, a count of products synced, and a recent webhook time. If products haven't appeared, press Sync now.
3. No Shopify? Adding coffee manually
You don't need an online store to use BeanTrace. Plenty of roasters sell in person or through social media, and everything except automatic syncing works exactly the same.
Go to Products and add each coffee by hand — name, price, roast details, and a photo. That's all customers need to log a brew, rate a bag, and earn points. You can connect Shopify later and your existing data stays put.
Adding a lot of coffees at once — CSV upload
If you have more than a handful of coffees, don't type them one by one. On the Products screen (and during first-time setup) there's an Upload CSV option. Click Download template first — it gives you a spreadsheet with the right columns already in place, so you just fill in your coffees and upload it back.
Each row is one coffee at one size. If you sell the same coffee in 250g and 1kg, that's two rows — same details, different weight and price. The columns are:
| Column | What goes in it |
|---|---|
name | The coffee's name, e.g. Yemen Attara Natural |
country | Origin, e.g. Yemen |
process | Washed, Natural, Honey, etc. |
roast_degree | Light, Medium, or Dark |
cupping_notes | Tasting notes. If they contain commas, wrap them in quotes: "Date, cocoa, warm spice" |
image_url | A public web link to the coffee's photo |
weight_grams | The bag size in grams, e.g. 250 or 1000 |
retail_price | Price for that size (EGP) |
stock_grams | How much you have in stock, in grams |
wholesale_price | Your B2B price for that size (leave blank if you don't sell wholesale) |
Keep the header row exactly as the template has it, save as .csv, and upload. Rows with no name are skipped.
Bringing your existing customers and points across
Already have a loyalty list from an old system? You don't have to start everyone from zero. On the Customers screen there's an Import customers from a file option that takes a CSV with these columns: name, email, phone, and points_balance. Every row needs at least a name or an email; the rest are optional. Anyone whose email is already on your list is skipped, so you can safely re-run it. When a customer later signs into the app with that same email, their imported points are already waiting for them.
Bringing your order history across
You can bring past orders too, so customers keep their full purchase record from day one. On the Orders screen, the Import past orders panel takes a CSV with these columns: order_number, email, ordered_at, total, currency, items, status, fulfillment_status. Orders are matched to customers by email, so import your customers first. Re-running the same file is safe — orders with the same number aren't duplicated. Any order whose email isn't on your customer list still imports; it just won't be linked to a person until that customer exists.
4. Your panel, screen by screen
The menu down the left is your whole brand. Here's what each screen is for.
| Screen | What it's for |
|---|---|
| Overview | Your dashboard: customers, points activity, recent campaigns. Start here. |
| Send notification | Push a message to your customers' phones — a new roast, an event, a restock. |
| Customers | Everyone connected to your brand, and how many are actually on the app. |
| Orders | Orders from your store, synced automatically if you connected Shopify. |
| Products | Your coffees. Synced from Shopify, or added by hand. |
| Points & rewards | How many points each action earns. This is the heart of your loyalty programme. |
| Rewards catalog | What customers can spend points on — a free bag, a discount, a cupping session. |
| Redemptions | Rewards customers have claimed, so you know what to hand over. |
| Offers | Promotions shown in the app, with a photo and a link to your shop. |
| Approvals | Customer reviews waiting for your read before they publish. |
| Community | Your brand's feed — post updates, reply to customers. |
| Automations | Messages that send themselves, like a nudge when someone's been away. |
| Demand signals | What your customers are actually brewing and asking for. |
| What to roast next | Suggestions drawn from those signals. |
| Crop vote | Let customers vote on your next coffee. |
| Source green coffee | Find green coffee from suppliers on BeanTrace. |
| Integrations | Shopify, push notifications, and your roaster code. |
Points & rewards — set this up early
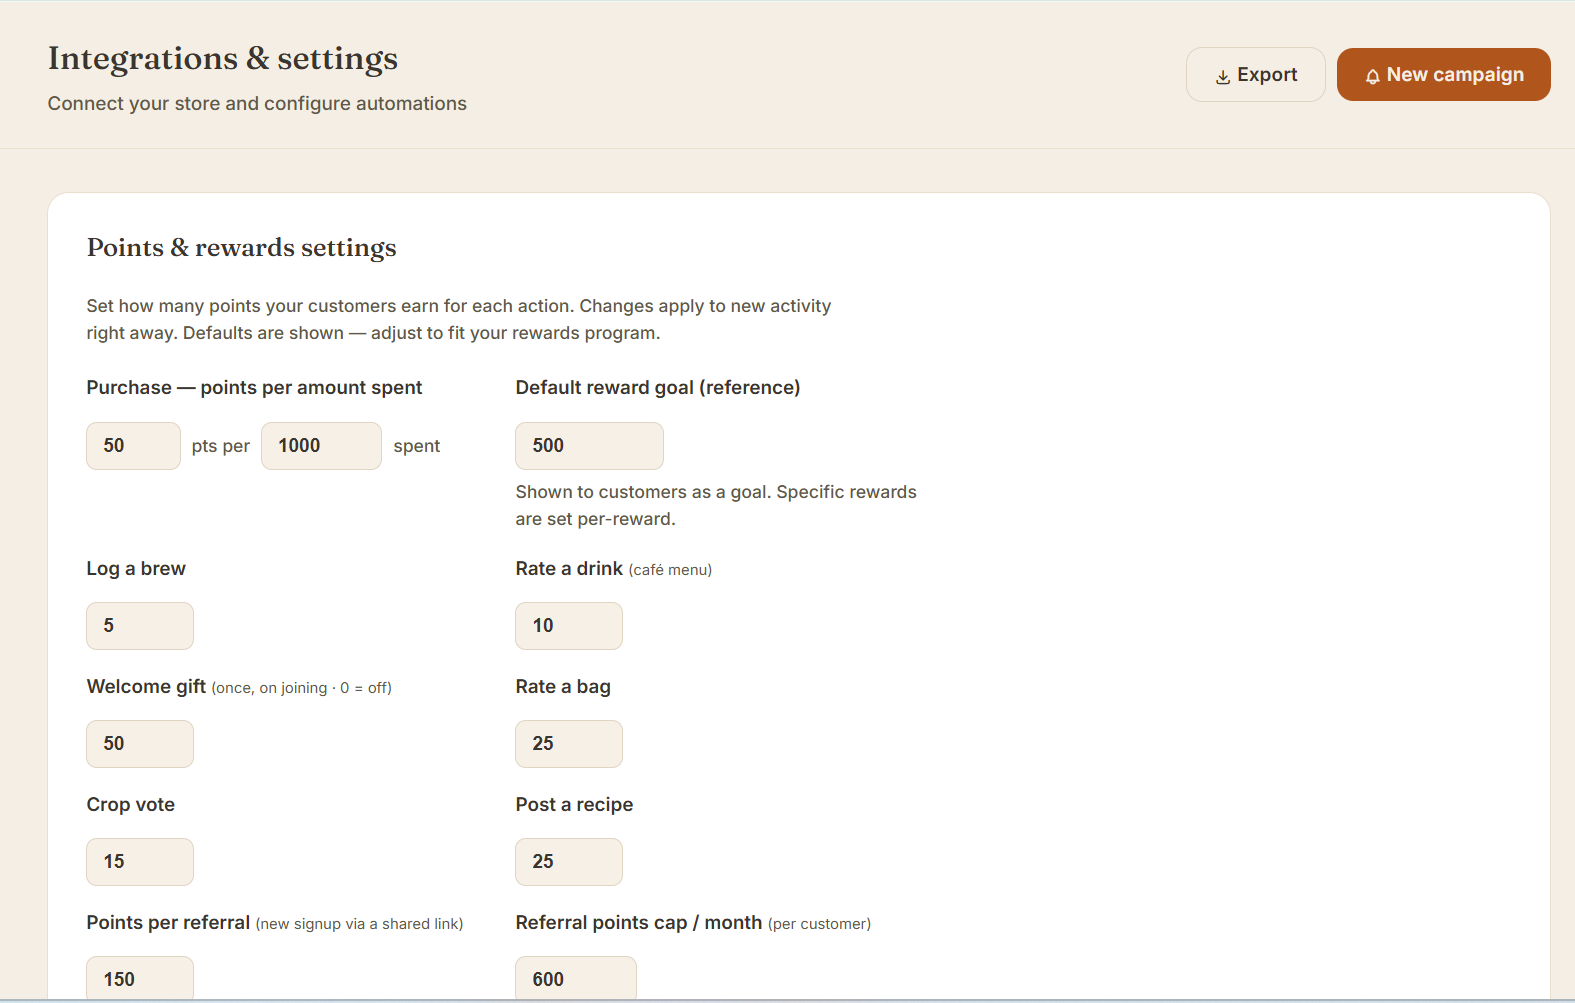
This is what makes customers come back. You decide what each action is worth: buying a bag, logging a brew, leaving a review, visiting your café. Then in Rewards catalog you say what those points buy.
Keep the first reward genuinely reachable. A reward that takes six months to earn is a reward nobody chases.
Keeping the maths honest
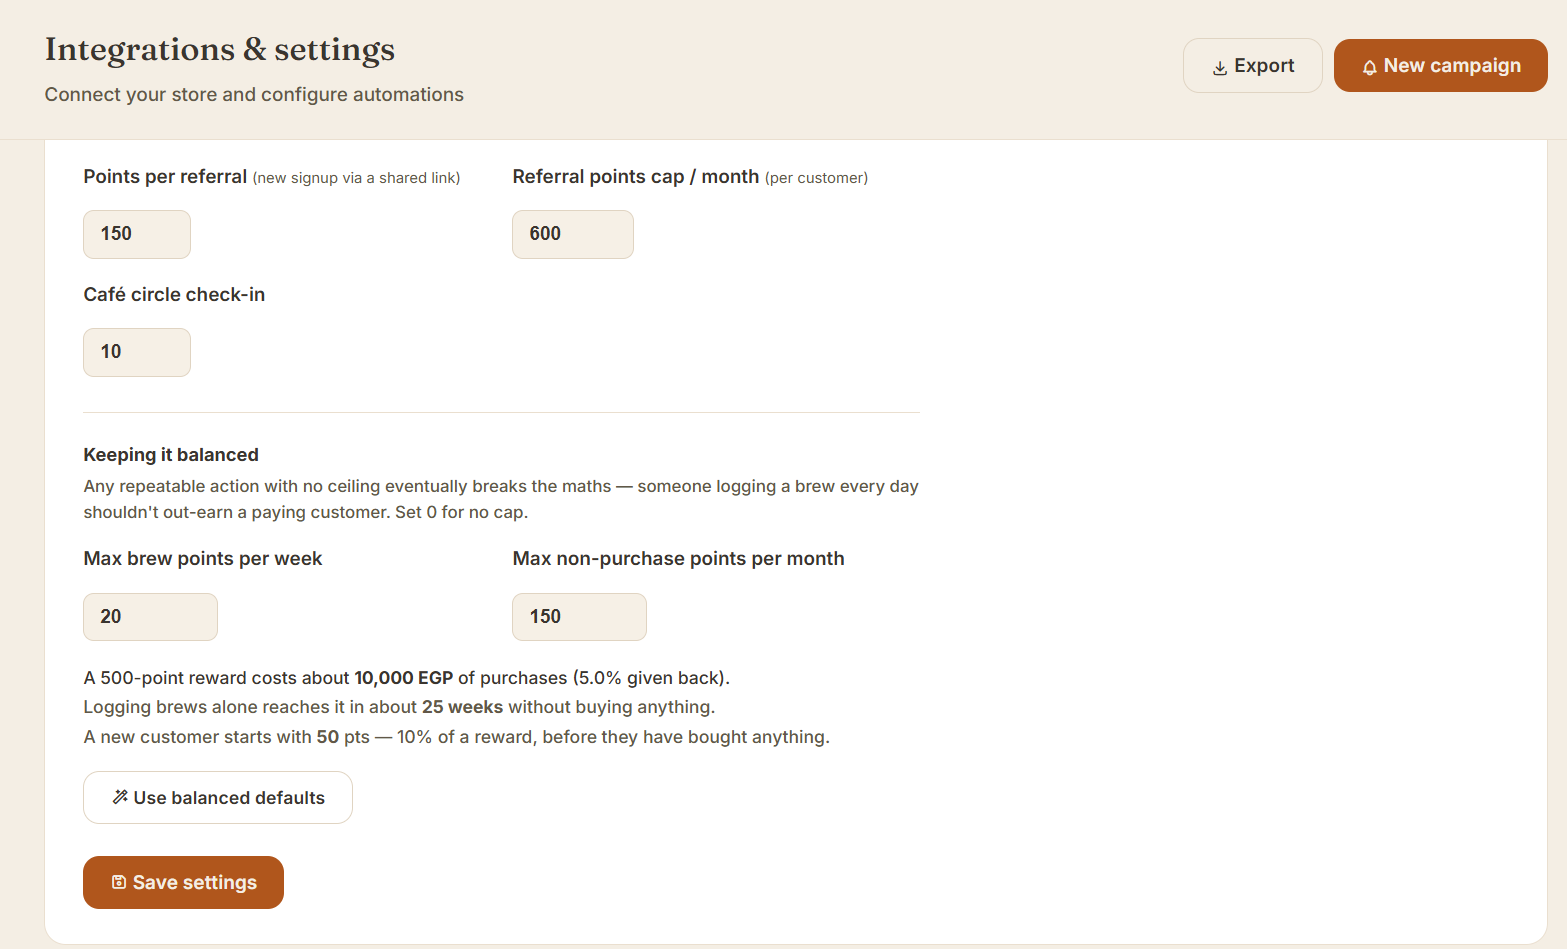
Further down the same screen are the caps, and they matter more than they look. Any action a customer can repeat forever will eventually break your economics — someone logging a brew every morning shouldn't out-earn a customer who actually buys coffee. Set a weekly cap on brew points and a monthly cap on non-purchase points, or 0 for no cap.
BeanTrace does the arithmetic as you type: what a reward really costs you in sales, how long it takes to reach without buying anything, and how much a new customer starts with. If those numbers look uncomfortable, they are — adjust before you launch, not after. Use balanced defaults is a sane starting point.
Offers — your space on the app's home screen
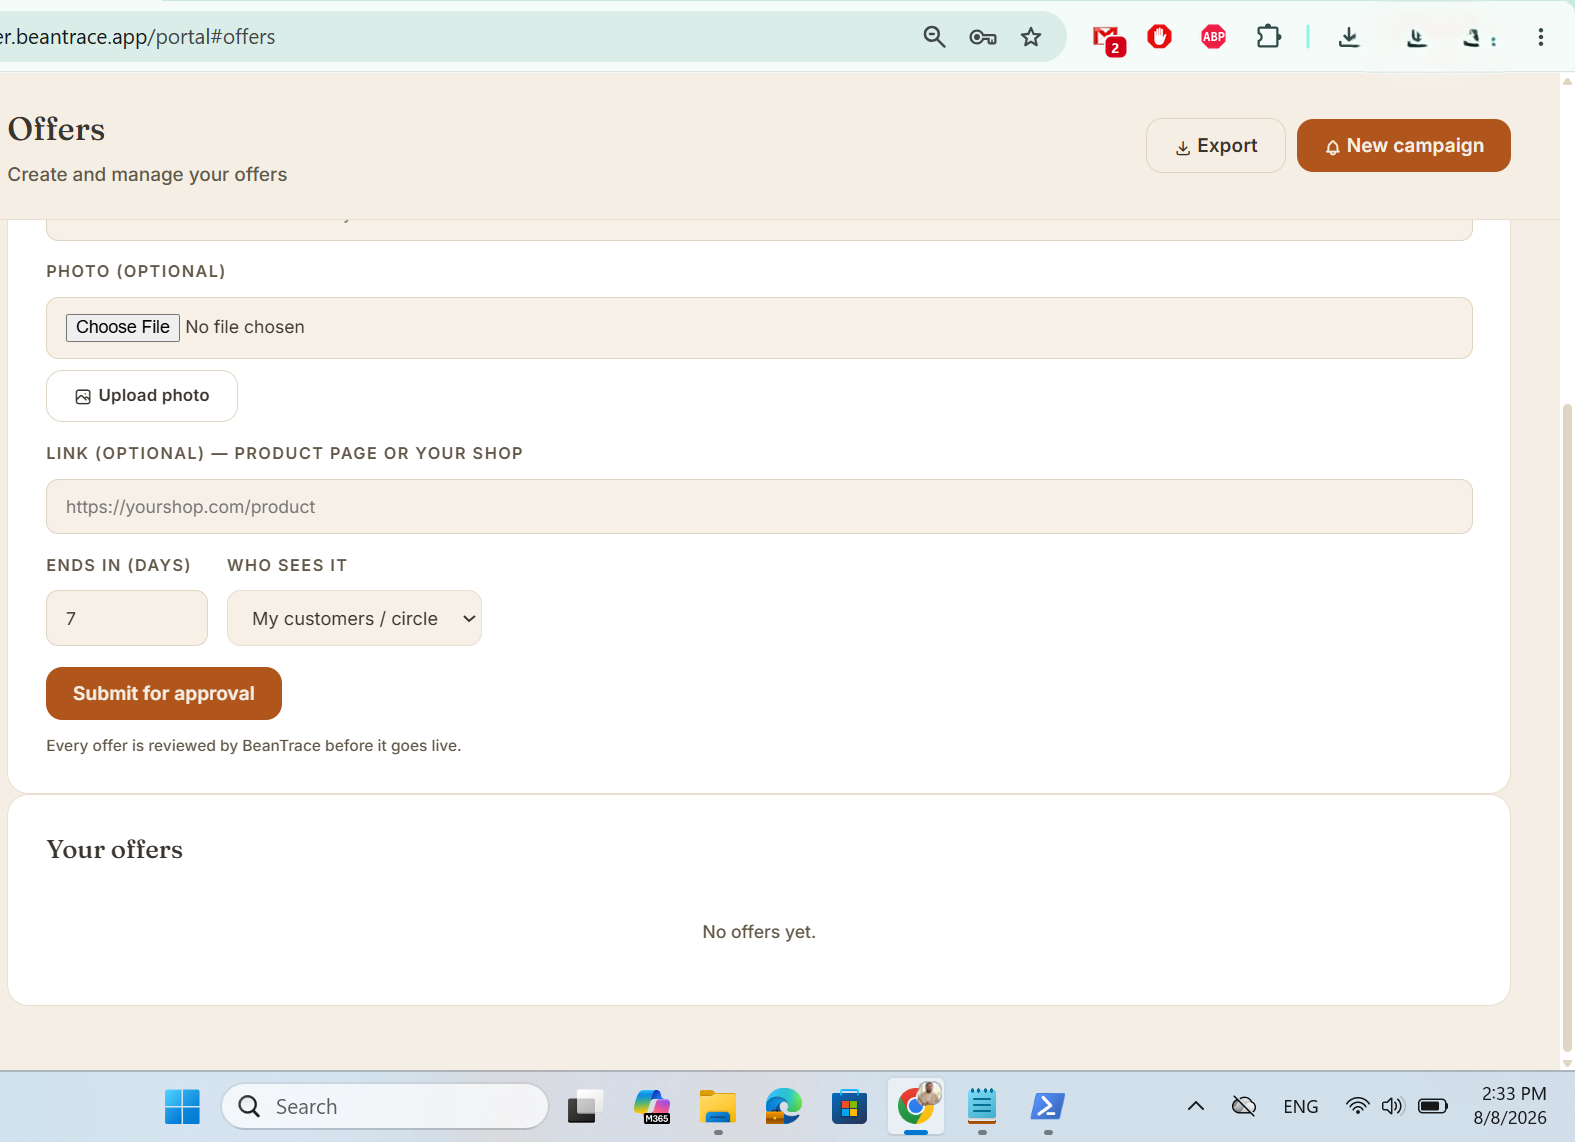
An offer is a photo card customers see on their home screen. Add a picture of the coffee, a short title, the discount, and a link to that product or your shop. Offers are reviewed before they go live.
How far an offer reaches depends on your plan — from your own customers up to every BeanTrace user.
Your logo and country
In Integrations, set both. Use a square logo — it's shown in circles throughout the app, so a wide wordmark loses its edges. Your country matters because customers see brands from their own country first.
5. If you also run a café
Cafés get extra screens for the room itself.
Your circle QR code
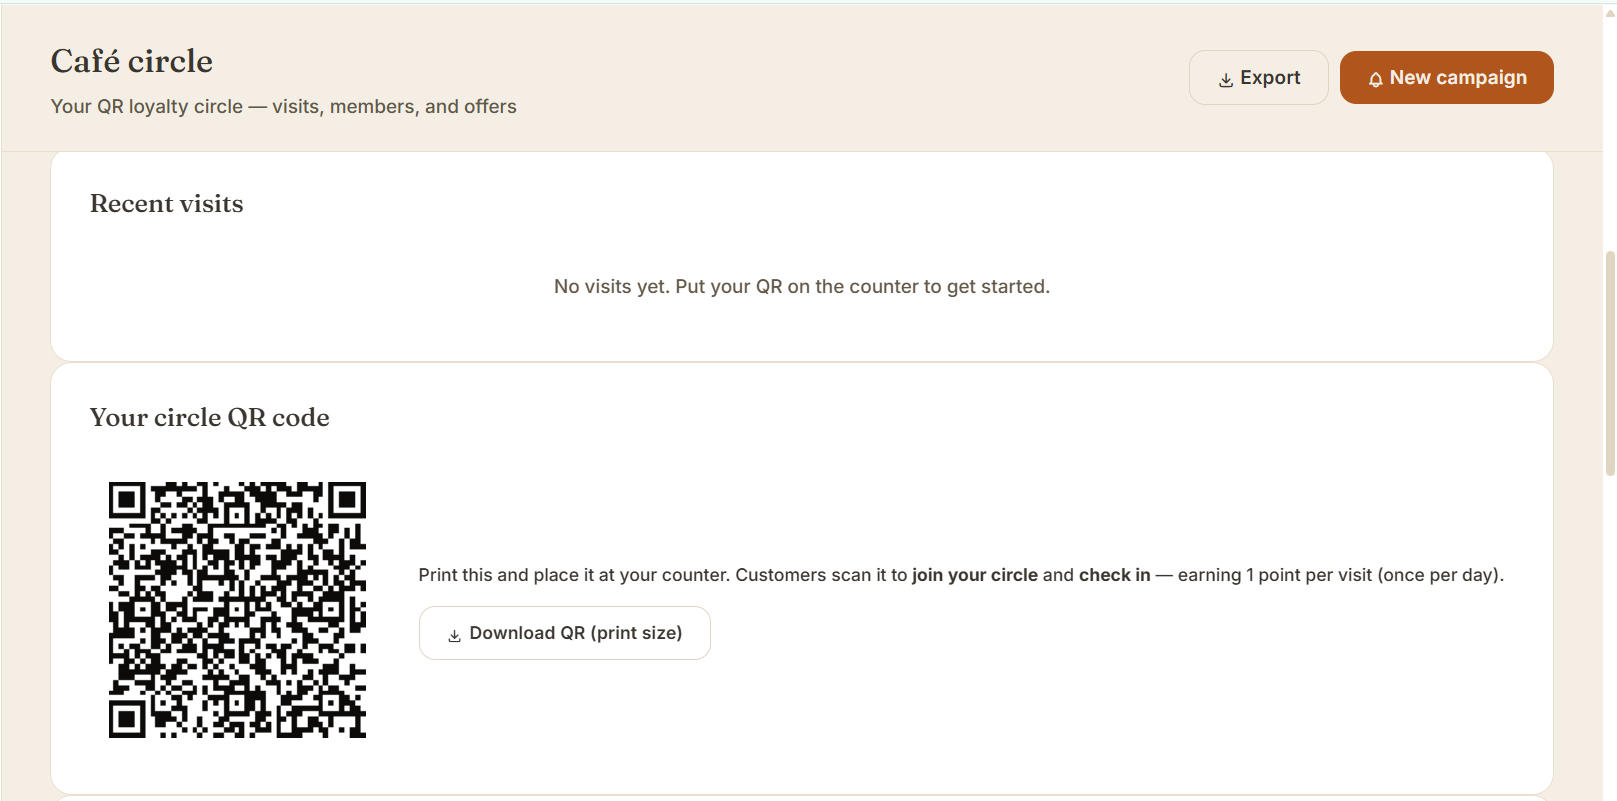
Print it and put it on the counter. Customers scan to join your circle and check in, earning a point per visit (once a day). Every check-in puts your café in their pocket and lets you send them offers directly.
Pin your locations
In Café circle, add each branch: stand inside it, name it, and press Add this branch. This matters more than it sounds — BeanTrace checks the customer is actually at your café before awarding a check-in, which stops people scanning a photo of your QR from home. One QR works at every branch.
Pin accurately. If your pin is in the wrong place, real customers get turned away.
Your menu
Add your drinks and food so customers can browse and rate them. Ratings appear next to each item for everyone to see — which is genuinely useful feedback about what's working.
6. Your first week — a checklist
Do these and you're properly live, not just signed up.
- Decide which email you sign up with — the same one you use as a customer makes you appear as your brand in the app
- Upload a square logo and set your country
- Connect Shopify, or add your coffees by hand
- Set your points values and create at least one reachable reward
- Create one offer with a good photo and a link
- Post once in your community feed so the brand doesn't look empty
- If you have a café: print the QR, pin every branch, add your menu
- Tell your existing customers — email them, post it, put a card by the till
The last one. Most brands set everything up beautifully and never tell anyone. Your existing customers are the ones who'll actually use this — a single email to your list does more than a month of waiting to be discovered.
7. Getting help
Email Support@beantrace.app — a real person reads it. Tell us what screen you're on and what you expected to happen, and we'll get you sorted.